Cách nấu xôi mùng 1 tháng Chạp dẻo thơm, đẹp mâm cúng
Xôi là món không thể thiếu trên mâm cúng mùng 1 tháng Chạp, nếu nắm vững bí quyết chọn gạo, ngâm nếp và hấp xôi đúng cách sẽ giúp xôi dẻo thơm, đẹp mắt.
Xôi từ lâu đã trở thành món ăn quen thuộc trong đời sống người Việt, xuất hiện trong bữa sáng thường ngày lẫn những dịp lễ Tết, giỗ chạp, rằm, mùng một. Trên mâm cúng, đĩa xôi đầy đặn, hạt nếp căng bóng, hương thơm lan tỏa không chỉ thể hiện sự tươm tất mà còn gửi gắm ước nguyện về một năm đủ đầy, ấm no, an lành.
Vào mùng 1 tháng Chạp là thời điểm mở đầu cho tháng cuối cùng của năm âm lịch, nhiều gia đình chuẩn bị mâm lễ chu đáo để cúng gia tiên, thần linh. Trong mâm cúng đó, xôi gần như là món không thể thiếu. Tùy phong tục từng vùng và điều kiện mỗi nhà, xôi cúng thường là xôi gấc đỏ, xôi đỗ xanh, xôi lạc, xôi ngũ sắc hoặc xôi trắng. Dù là loại xôi nào, yếu tố quan trọng nhất vẫn là nắm vững bí quyết nấu xôi ngon, để xôi chín đều, dẻo mềm, thơm tự nhiên và giữ được vẻ đẹp khi bày biện.
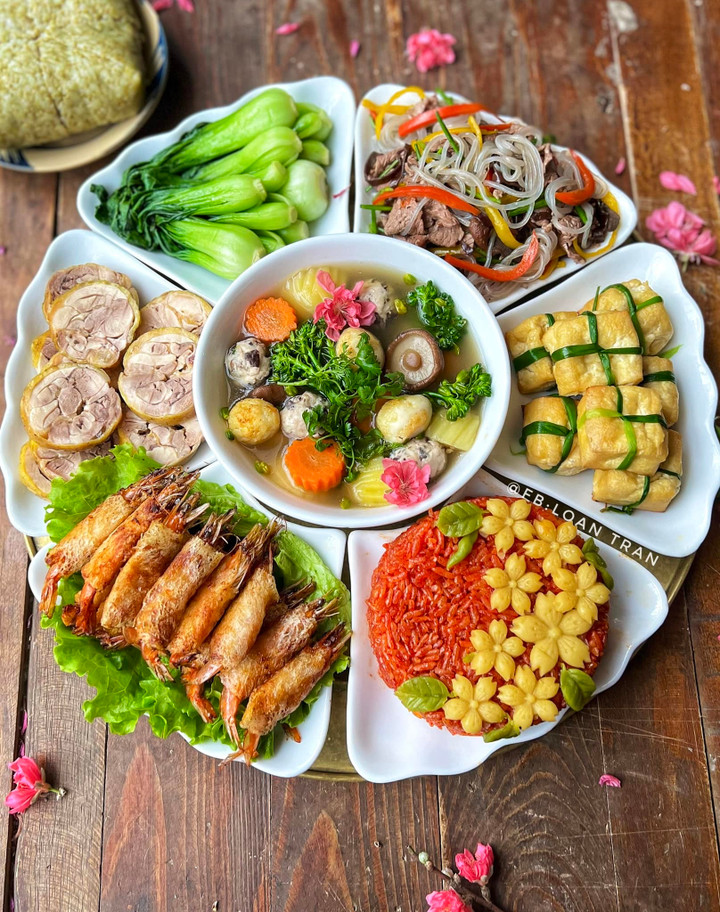
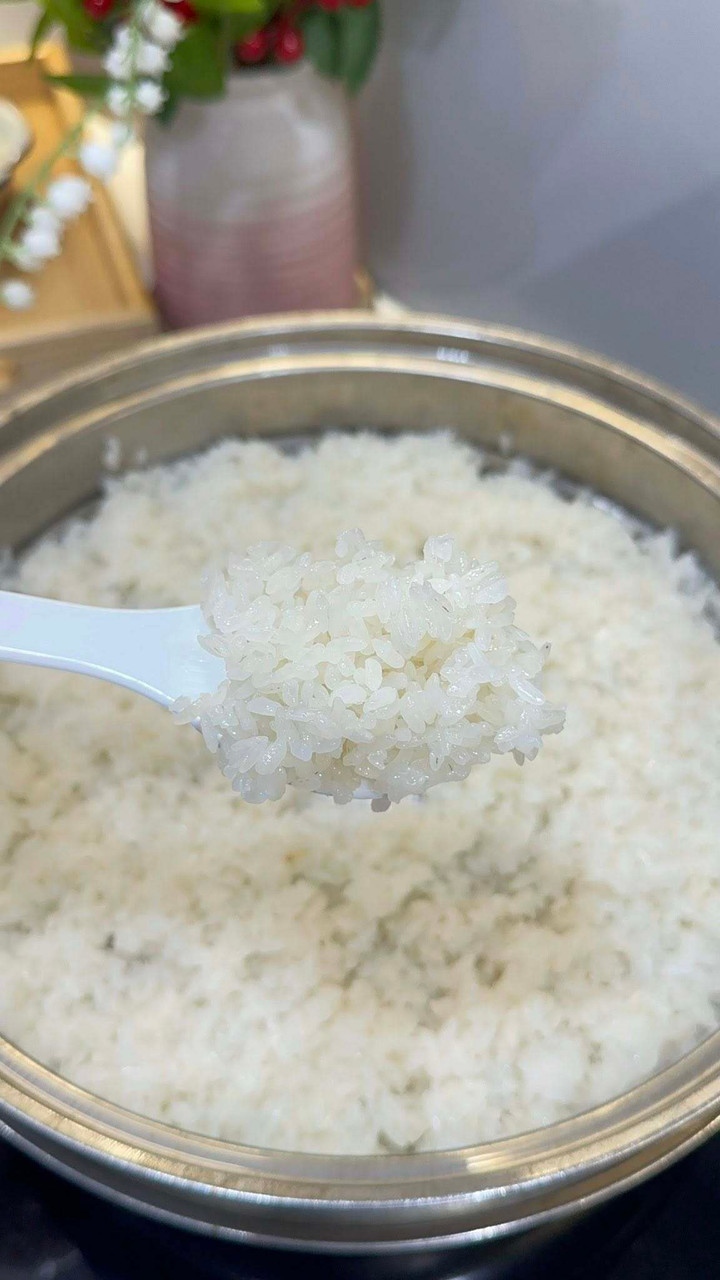
Trong mâm cúng mùng 1 tháng Chạp không thể thiếu món xôi. (Ảnh: Loan Trần)
Cách nấu xôi mùng 1 tháng Chạp dẻo thơm
Dưới đây là những kinh nghiệm được nhiều người nội trợ áp dụng để có nồi xôi dẻo thơm, tròn vị và đẹp mâm cúng.
Chọn loại gạo nếp ngon
Gạo nếp quyết định tới khoảng 70% chất lượng món xôi. Vì vậy, khâu chọn gạo được xem là quan trọng nhất. Một mẻ xôi ngon trước hết phải bắt đầu từ loại nếp tốt.
Những giống nếp được nhiều người ưa chuộng như nếp Tú Lệ, nếp cái hoa vàng, nếp trứng ngỗng đều có hương thơm tự nhiên, vị ngọt nhẹ. Khi đồ chín, hạt nếp nở vừa, dẻo nhiều, mềm, bóng, đặc biệt là để nguội vẫn giữ được độ dẻo ngon, không bị cứng.
Khi mua gạo nếp, nên chọn loại hạt đều, tròn, màu trắng đục tự nhiên, căng bóng, ít gãy vỡ và có mùi thơm dịu của lúa mới. Tránh chọn loại gạo quá trắng vì đó thường là gạo đã xay xát quá kỹ, mất lớp cám bên ngoài – nơi chứa nhiều dưỡng chất và cũng làm giảm độ thơm của nếp.
Ngâm gạo đúng cách trước khi đồ xôi
Ngâm gạo là bước không thể bỏ qua nếu muốn xôi dẻo thơm. Tùy từng loại nếp, thời gian ngâm có thể khác nhau, nhưng phổ biến nhất là từ 6 – 8 tiếng. Khoảng thời gian này giúp hạt nếp hút đủ nước, khi hấp sẽ chín đều từ trong ra ngoài, không bị sượng lõi.
Không nên ngâm nếp quá lâu vì gạo dễ bị chua, khi đồ lên xôi sẽ bở, nát và mất mùi thơm. Trong quá trình ngâm, có thể cho thêm một chút muối để khử mùi, đồng thời giúp xôi sau khi chín có vị đậm đà hơn. Sau khi ngâm, vo lại gạo nhẹ tay, để ráo nước trước khi cho vào chõ hấp.
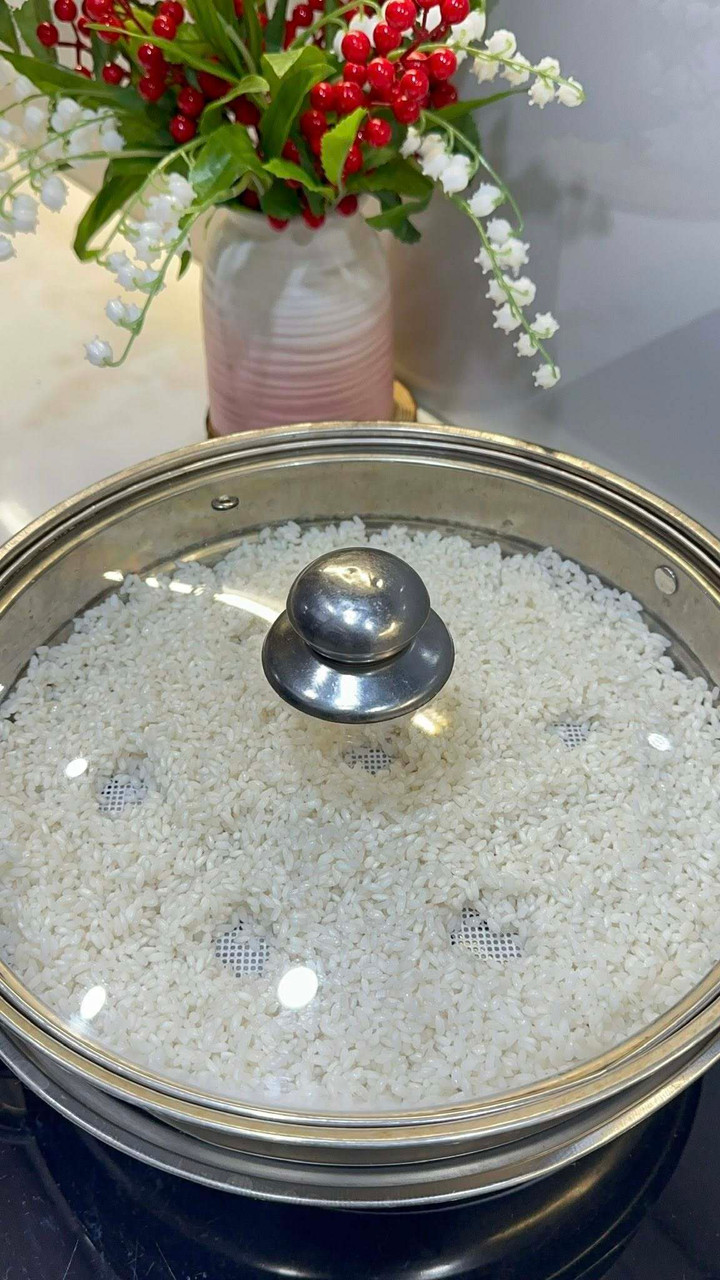
Hấp xôi lần 1 trong 30 phút, chọc một vài lỗ cho xôi chín đều. (Ảnh: Hằng Kẹo)
Cho gạo vào nồi bằng tay để xôi chín đều
Nhiều người thường gặp tình trạng xôi nhão ở lớp giữa, khô ở lớp trên và khê ở phần đáy. Nguyên nhân chủ yếu là do nhiệt không đều và hạt nếp bị dồn, nén chặt, khiến hơi nước không lưu thông tốt.
Một mẹo nhỏ nhưng rất hiệu quả là thay vì đổ cả thau gạo vào chõ, hãy dùng tay bốc từng nắm nhỏ rải đều. Cách làm này giúp các hạt nếp tơi ra, không bị chèn ép, tạo độ thông thoáng để hơi nước lan tỏa đều, giúp xôi chín đồng nhất.
Ngoài ra, có thể dùng một chiếc khăn ẩm phủ bên ngoài nắp nồi. Khăn ẩm giúp bịt kín miệng nồi, hạn chế hơi nước thoát ra, tránh tình trạng xôi bị khô và chín không đều.
Khi xếp xôi vào chõ, có thể vun vào giữa và để hở xung quanh, hoặc dàn đều mặt chõ rồi dùng đũa chọc 3 – 4 lỗ to để hơi nước bốc lên thuận lợi hơn.
Canh lượng nước dưới nồi hấp
Nước trong nồi hấp chỉ nên chiếm khoảng 1/3 dung tích nồi. Lượng nước này đủ để tạo hơi làm mềm hạt nếp nhưng không quá nhiều khiến xôi nhão, nát, ảnh hưởng tới hình thức và chất lượng món ăn.
Một cách kiểm soát nước đơn giản là đặt một chiếc đĩa sứ lên mặt nước trong nồi. Khi nghe thấy tiếng lạch cạch, tức là nước đã cạn. Nếu lúc đó xôi chưa chín, cần châm thêm nước kịp thời để tránh cháy đáy nồi.
Trước khi đặt chõ xôi lên, nên đun nước trong nồi hấp cho sôi hẳn. Sau đó mới tiến hành hấp xôi và giữ nhiệt độ ổn định trong suốt quá trình.
Không nên để lửa quá lớn vì xôi dễ cháy khét, cũng không nên để lửa quá nhỏ khiến xôi chín chậm, dễ bị nhão. Mức lửa vừa, hơi nước bốc đều là điều kiện lý tưởng để đồ xôi.
Thời gian hấp xôi
Tùy loại nếp, thời gian hấp thường dao động từ 30 – 40 phút. Trong quá trình hấp, cứ khoảng 10 phút nên mở nắp, dùng khăn sạch lau khô nước đọng trên nắp để tránh nước rơi xuống làm nhão xôi. Đồng thời, dùng đũa đảo nhẹ để xôi chín đều. Đây là bước quan trọng giúp từng hạt gạo nếp chín tới, không sượng lõi, không nát bên ngoài.
Khi xôi đã chín, có thể rưới lên bề mặt một ít dầu ăn hoặc mỡ gà, sau đó đảo đều. Lớp dầu mỏng giúp hạt xôi căng bóng, mềm mượt, tăng mùi thơm và hạn chế tình trạng xôi bị khô khi để nguội.
Đảo đều xôi và đồ lần thứ 2 thêm 15 phút. (Ảnh: Hằng Kẹo)
Đồ xôi hai lửa
Để xôi giữ được độ ngon, mềm dẻo trong thời gian dài, nhiều người áp dụng cách đồ xôi hai lửa. Khi xôi vừa chín tới, xới ra mâm lớn, dàn đều cho nguội bớt. Sau đó cho xôi vào chõ hấp lại lần nữa. Cách làm này giúp xôi chín kỹ nhưng không nhão, hạt nếp săn lại, khi để lâu vẫn dẻo mềm.
Sau khi hấp xong, nên ủ xôi trong nồi hoặc nồi cơm điện ở chế độ giữ ấm khoảng 10 – 15 phút để hạt nếp tiếp tục “nở đều”, xôi mềm và dẻo hơn. Tránh để xôi nguội ngoài không khí quá lâu vì xôi dễ khô cứng và mất mùi thơm.
Khi bày xôi cúng, nên lót lá chuối hoặc lá dong, đắp xôi thành hình tròn hoặc vun cao gọn gàng quanh gà luộc (nếu có) ở giữa đĩa lớn. Có thể dùng hoa cúc, lá dong tỉa trang trí để mâm lễ thêm trang trọng. Các lễ vật khác như mâm ngũ quả, trà rượu nên đặt cân đối xung quanh để tổng thể hài hòa.
Cách nấu xôi gấc
Theo quan niệm truyền thống của người Việt, màu đỏ tượng trưng cho may mắn, hỷ sự và sung túc. Bởi vậy, xôi gấc với sắc đỏ tự nhiên thường xuyên xuất hiện trên mâm cúng ngày Tết, lễ trọng và đặc biệt là mùng 1 tháng Chạp, thời điểm khởi đầu cho tháng cuối cùng của năm.
Nguyên liệu
- Gạo nếp: 1kg
- Gấc: 1 quả
- Muối đường
- Nước cốt dừa 80ml
- Mỡ gà
Cách thực hiện
Gạo nếp đem ngâm khoảng 6 tiếng rồi đãi sạch. Khi mua gạo, nên hỏi rõ là gạo mới hay gạo cũ, gạo mới ngâm khoảng 6 tiếng là đủ, còn gạo cũ cần ngâm lâu hơn để hạt nếp mềm và hút đủ nước.
Sau khi ngâm, vớt gạo ra rổ cho ráo, trộn với muối, xóc đều rồi để khoảng 3 tiếng cho hạt nếp se lại. Tiếp đó, trộn gạo với gấc. Phần gấc nên được đánh đều trước với một chút rượu trắng để khử mùi nhựa và làm dậy màu, sau đó trộn vào gạo và để thêm 30 – 40 phút cho gạo ngấm màu.
Trong lúc chờ, chuẩn bị nồi đồ xôi. Khi nồi nước chỉ hơi ấm, cho chõ lên, lưu ý chõ phải đặt cao hẳn phía trên, lượng nước trong nồi chỉ khoảng nửa nồi. Mỡ gà mua về rửa sạch, chần nhanh qua nước sôi để bớt mùi, để riêng.
Cho gạo trộn gấc vào chõ, dàn đều và bắt đầu đồ xôi. Sau khoảng 15 – 20 phút, mở nắp kiểm tra độ chín. Khi xôi đã chín, xới ra rổ hoặc mâm, để thoáng.

Xôi hấp lần 1 để ra rổ cho thoáng. (Ảnh: Minh Châu)
Đem xôi đồ lại lần hai, đây là bước “đồ xôi hai lửa” giúp xôi dẻo và thơm hơn hẳn. Lần đồ thứ hai nên hấp kỹ, khoảng 15 - 20 phút. Khi xôi nóng trở lại, cho nước cốt dừa, đường và mỡ gà vào trộn đều. Theo tỷ lệ gợi ý, với 1 kg gạo, dùng khoảng 8 thìa đường và 3 thìa mỡ gà. Lượng đường có thể gia giảm tùy khẩu vị, nhưng xôi gấc nên có vị ngọt nhẹ để tránh cảm giác lợ.
Khi cho xôi vào khuôn hoặc đĩa bày, không nên nén chặt. Hạt xôi cần tơi, không bị “dí” vào nhau nhưng vẫn phải dẻo và kết dính tự nhiên. Chính lớp mỡ gà sẽ giúp xôi bóng, mềm và thơm hơn, tạo cảm giác tròn vị khi thưởng thức.
Xôi gấc với hương thơm dịu của nếp và gấc quyện cùng vị béo của mỡ gà. (Ảnh: Hòa Bùi)
Cách nấu xôi đỗ xanh
Xôi đỗ xanh là món xôi phổ biến, không chỉ xuất hiện trong bữa ăn hằng ngày mà còn được nhiều gia đình lựa chọn để dâng cúng trong các dịp lễ, rằm, mùng một.
Nguyên liệu
- Nếp: 500 g
- Đậu xanh cà vỏ: 200 g
- Nước cốt dừa: 250 ml
- Muối: 1/2 thìa cà phê
- Đường: 2 thìa cà phê
Cách thực hiện
Đầu tiên là ngâm gạo nếp và đậu xanh ít nhất 3 tiếng, tốt nhất có thể ngâm qua đêm. Sau đó vo sạch, để ráo nước. Trộn nếp và đậu xanh đã ráo với muối và đường, xóc đều cho thấm. Trong lúc đó, bắc nồi hấp lên bếp, đun cho nước sôi. Khi nước sôi mạnh, cho hỗn hợp nếp và đậu vào chõ, dàn đều và bắt đầu hấp.
Hấp xôi khoảng 30 – 40 phút, trong quá trình hấp thỉnh thoảng mở nắp, lau nước đọng và đảo đều. Khi xôi chín, rưới 250 ml nước cốt dừa vào, trộn nhẹ tay rồi hấp thêm khoảng 10 phút để nước cốt dừa chín, thấm đều, giúp xôi tơi xốp, béo thơm.
Thành phẩm là xôi đỗ xanh có màu vàng nhạt, hạt nếp căng bóng, vị bùi của đậu quyện cùng mùi béo của dừa, rất thích hợp để bày mâm cúng.

Xôi đỗ xanh có màu vàng nhạt, hạt nếp căng bóng dẻo thơm. (Ảnh: Trương Hà Uyên)
Ngoài xôi đỗ xanh, xôi đậu phộng cũng là lựa chọn được nhiều người yêu thích. Cách nấu tương tự xôi đậu xanh, chỉ lưu ý đậu phộng cần luộc chín trước khoảng 30 phút, sau đó trộn với nếp và thực hiện các bước hấp như trên.
Với những bí quyết từ khâu chọn gạo, ngâm nếp, canh nước, giữ nhiệt cho đến cách hấp hai lửa và hoàn thiện, việc nấu một nồi xôi dẻo thơm, đẹp mắt để dâng cúng mùng 1 tháng Chạp sẽ không còn là điều quá khó. Chỉ cần chú ý từng công đoạn nhỏ, người nội trợ hoàn toàn có thể tự tay chuẩn bị đĩa xôi tròn đầy, thơm thảo, góp phần làm mâm lễ thêm trang trọng và ấm cúng.
Sticky rice is an indispensable dish on the offering tray for the first day of the twelfth lunar month. Mastering the secrets of choosing the right rice, soaking the glutinous rice, and steaming it correctly will result in fragrant, delicious, and visually appealing sticky rice.
Sticky rice has long been a familiar dish in Vietnamese life, appearing in daily breakfasts as well as on holidays, anniversaries, and the first day of the lunar month. On the offering tray, a generous plate of sticky rice, with plump, glossy grains and a fragrant aroma, not only shows meticulousness but also conveys wishes for a year of abundance, prosperity, and peace.
The first day of the twelfth lunar month marks the beginning of the last month of the lunar year, and many families prepare a meticulous offering tray to worship their ancestors and deities. Sticky rice is almost an essential item on this offering tray. Depending on regional customs and family circumstances, the sticky rice offered is usually red gac fruit sticky rice, mung bean sticky rice, peanut sticky rice, multicolored sticky rice, or plain white sticky rice. Regardless of the type of sticky rice, the most important factor is mastering the secret to cooking delicious sticky rice, ensuring it cooks evenly, is soft and chewy, has a natural aroma, and looks beautiful when presented.
Sticky rice is an indispensable dish on the offering tray for the first day of the twelfth lunar month. (Photo: Loan Tran)
How to cook fragrant and chewy sticky rice for the first day of the twelfth lunar month
Below are some experiences that many home cooks apply to have a pot of fragrant, chewy, and beautifully presented sticky rice for the offering tray.
Choosing good quality glutinous rice
The quality of the glutinous rice determines about 70% of the quality of the sticky rice. Therefore, choosing the rice is considered the most important step. A delicious batch of sticky rice must first start with good quality glutinous rice.
Popular glutinous rice varieties such as Tu Le glutinous rice, Cai Hoa Vang glutinous rice, and Trung Ngoi glutinous rice all have a natural aroma and a slightly sweet taste. When cooked, the rice grains expand just right, are very chewy, soft, glossy, and especially retain their delicious chewiness even when cooled, without becoming hard.
When buying glutinous rice, choose grains that are uniform, round, naturally opaque white, plump, with minimal breakage, and have a mild aroma of freshly harvested rice. Avoid rice that is too white, as this is often rice that has been milled too thoroughly, losing the outer bran layer – which contains many nutrients – and also reducing the aroma of the glutinous rice.
Soaking the rice properly before steaming
Soaking the rice is an essential step if you want fragrant and chewy sticky rice. Depending on the type of glutinous rice, the soaking time may vary, but the most common is 6-8 hours. This time allows the rice grains to absorb enough water, ensuring they cook evenly from the inside out when steamed, without becoming hard or undercooked.
Do not soak the rice for too long, as it can easily become sour, resulting in mushy and less fragrant sticky rice. During soaking, you can add a little salt to remove any odor and enhance the flavor of the cooked rice. After soaking, gently rinse the rice and drain the water before steaming.
Steam the sticky rice for 30 minutes, then poke a few holes in it to ensure even cooking. (Photo: Hang Keo)
Add the rice to the pot by hand for even cooking.
Many people often experience sticky rice that is mushy in the middle, dry on top, and burnt at the bottom. The main reason is uneven heat and the rice grains being compressed, preventing proper steam circulation.
A small but very effective trick is that instead of pouring the whole bowl of rice into the steamer, use your hands to scoop small handfuls and spread them evenly. This method helps the rice grains loosen, preventing them from being compressed, creating ventilation for the steam to spread evenly, and ensuring the sticky rice cooks uniformly.
Alternatively, you can use a damp cloth to cover the outside of the pot lid. The damp cloth helps seal the pot opening, limiting steam escape and preventing the sticky rice from drying out and cooking unevenly.
When arranging sticky rice in the steamer, you can either pile it in the center and leave the sides open, or spread it evenly and use chopsticks to poke 3-4 large holes to allow steam to rise more easily.
Monitor the water level in the steamer.
The water in the steamer should only occupy about 1/3 of the pot's capacity. This amount of water is enough to create steam to soften the rice grains but not so much that the sticky rice becomes mushy, affecting the appearance and quality of the dish.
A simple way to control the water level is to place a ceramic plate on the surface of the water in the pot. When you hear a rattling sound, it means the water has run out. If the sticky rice is not yet cooked, add more water promptly to prevent burning the bottom of the pot.
Before placing the sticky rice in the steamer, bring the water in the pot to a rolling boil. Then proceed to steam the sticky rice and maintain a stable temperature throughout the process.
Do not use too high a heat as the sticky rice will easily burn, and do not use too low a heat as the sticky rice will cook slowly and become mushy. Medium heat and even steam are ideal conditions for steaming sticky rice.
Steaming Time
Depending on the type of glutinous rice, steaming time usually ranges from 30 to 40 minutes. During steaming, every 10 minutes, open the lid and use a clean cloth to wipe away any condensation to prevent water from dripping onto the rice and making it soggy. At the same time, gently stir with chopsticks to ensure even cooking. This is an important step to ensure each grain of glutinous rice is cooked perfectly, neither undercooked nor mushy on the outside.
Once the sticky rice is cooked, you can drizzle a little cooking oil or chicken fat on the surface, then stir well. A thin layer of oil makes the rice grains glossy, soft, and smooth, enhances the aroma, and prevents the rice from drying out when cooled.
Stir the rice and steam for a second time for another 15 minutes. (Photo: Hang Keo)
Steaming Sticky Rice Twice
To keep the sticky rice delicious and soft for a long time, many people use the method of steaming it twice. When the sticky rice is just cooked, scoop it onto a large tray and spread it evenly to cool slightly. Then, put the sticky rice back into the steamer and steam it again. This method ensures the sticky rice is thoroughly cooked but not mushy, the grains become firm, and it remains soft and chewy even after a while.
After steaming, let the sticky rice rest in a pot or rice cooker on the keep-warm setting for about 10-15 minutes to allow the rice grains to continue expanding evenly, resulting in softer and more chewy rice. Avoid letting the sticky rice cool in the air for too long, as it will dry out, become hard, and lose its aroma.
When offering sticky rice, line the plate with banana leaves or dong leaves, and shape the sticky rice into a round or neatly mounded shape around the boiled chicken (if any) in the center of a large plate. Chrysanthemums or carved dong leaves can be used for decoration to make the offering more solemn. Other offerings such as the five-fruit platter, tea, and wine should be placed symmetrically around the offering for overall harmony.
How to cook gac sticky rice
According to Vietnamese tradition, the color red symbolizes good fortune, joy, and prosperity. Therefore, gac sticky rice, with its natural red color, frequently appears on offering trays during Tet (Vietnamese New Year), important ceremonies, and especially on the first day of the twelfth lunar month, marking the beginning of the last month of the year.
Ingredients
Glutinous rice: 1kg
Gac fruit: 1
Salt and sugar
Coconut milk: 80ml
Chicken fat
Instructions
Soak the glutinous rice for about 6 hours, then rinse thoroughly. When buying rice, ask if it's new or old rice. New rice only needs about 6 hours of soaking, while old rice needs longer soaking to soften the grains and absorb enough water.
After soaking, drain the rice in a colander, mix with salt, and let it sit for about 3 hours until the grains are slightly dry. Next, mix the rice with the gac fruit. The gac fruit should be beaten beforehand with a little white wine to remove the sap smell and enhance the color, then mix it into the rice and let it sit for another 30-40 minutes to absorb the color.
While waiting, prepare the steamer. When the water in the pot is only slightly warm, place the steamer basket on top, making sure the basket is placed high above the rice, with the water level only about half full. Wash the chicken fat, blanch it quickly in boiling water to reduce the smell, and set it aside.
Place the rice mixed with gac fruit into the steamer, spread evenly, and begin steaming. After about 15-20 minutes, open the lid to check for doneness. Once the sticky rice is cooked, scoop it out into a basket or tray and let it air dry.
Steamed sticky rice (first steaming) is then placed in a basket to air dry. (Photo: Minh Chau)
Steam the sticky rice a second time; this is the "double steaming" step, which makes the sticky rice even more chewy and fragrant. The second steaming should be thorough, about 15-20 minutes. When the sticky rice is hot again, add coconut milk, sugar, and chicken fat and mix well. The suggested ratio is about 8 tablespoons of sugar and 3 tablespoons of chicken fat for 1 kg of rice. The amount of sugar can be adjusted according to taste, but gac sticky rice should have a slightly sweet taste to avoid an overly rich flavor.
When serving the sticky rice in a mold or on a plate, do not compress it tightly. The rice grains should be loose, not stuck together, but still chewy and naturally sticky. The layer of chicken fat will make the sticky rice glossy, soft, and more fragrant, creating a well-rounded flavor when enjoyed.
Gac sticky rice with the delicate aroma of glutinous rice and gac fruit combined with the richness of chicken fat. (Photo: Hoa Bui)
How to cook mung bean sticky rice
Mung bean sticky rice is a popular dish, not only appearing in daily meals but also chosen by many families to offer as a sacrifice during festivals, full moon days, and the first day of the lunar month.
Ingredients
Glutinous rice: 500 g
Peeled mung beans: 200 g
Coconut milk: 250 ml
Salt: 1/2 teaspoon
Sugar: 2 teaspoons
Instructions
First, soak the glutinous rice and mung beans for at least 3 hours, preferably overnight. Then rinse thoroughly and drain. Mix the drained glutinous rice and mung beans with salt and sugar, tossing well to absorb the flavors. Meanwhile, place a steamer pot on the stove and bring the water to a boil. When the water boils vigorously, add the glutinous rice and mung bean mixture to the steamer, spread evenly, and begin steaming.
Steam the sticky rice for about 30-40 minutes, occasionally opening the lid, wiping away condensation, and stirring. When the sticky rice is cooked, pour in 250 ml of coconut milk, gently mix, and steam for another 10 minutes to allow the coconut milk to absorb evenly, resulting in fluffy, fragrant sticky rice.
The finished product is light yellow sticky rice with plump, glossy grains, the nutty flavor of the mung beans combined with the rich aroma of coconut, perfect for offering on a ceremonial tray.
(Image caption: Light yellow sticky rice with plump, glossy, fragrant grains. (Photo: Truong Ha Uyen))
Besides sticky rice with mung beans, sticky rice with peanuts is also a popular choice. The cooking method is similar to sticky rice with mung beans, just note that the peanuts need to be boiled for about 30 minutes beforehand, then mixed with the sticky rice and steamed as above.
With the secrets from selecting the rice, soaking the glutinous rice, controlling the water, maintaining the temperature, to the double-steaming technique and finishing touches, cooking a pot of fragrant, sticky rice for offering on the first day of the twelfth lunar month will no longer be too difficult. By paying attention to each small step, homemakers can easily prepare a full, fragrant plate of sticky rice, contributing to a more solemn and warm offering table.